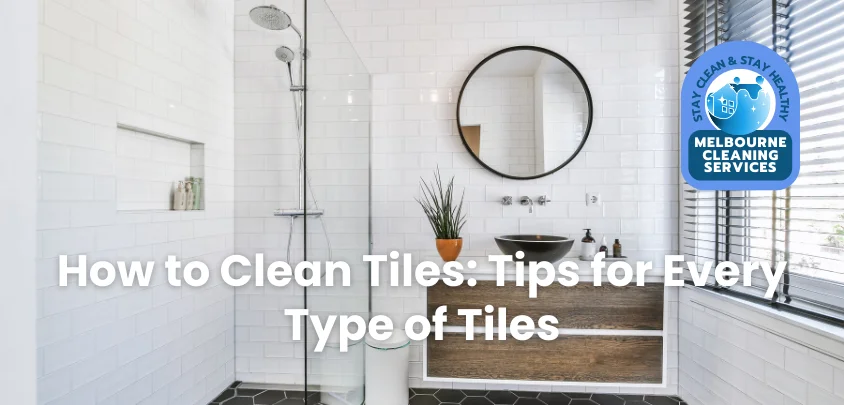
We specialise in professional tile cleaning services at Melbourne Cleaning Services. With years of experience, we’ve mastered the art of tile maintenance, ensuring every tile in your home or office looks its best. Our team of skilled cleaners understands the nuances of different tile types and is here to share our top tips to help you care for your tiles like a pro. Whether it’s regular maintenance or tackling tough stains, we have the knowledge and expertise to guide you every step of the way.
Understanding Your Tiles Before Cleaning
Identify the tile types first before using cleaning techniques. The cleaning approach can vary significantly depending on whether you have ceramic, porcelain, stone, or textured tiles. Here’s a brief overview:
1. Ceramic Tiles
Ceramic tiles are composed of clay and undergo a baking process at high heat to achieve durability. They combine durability and affordability, with a choice of colours and finishes (glazed or unglazed). They are ideal for indoor use and easy to maintain but can stain if not sealed properly.
2. Porcelain Tiles
Porcelain tiles are highly durable and resistant to moisture, produced from finely refined clay and fired at even higher temperatures than ceramic. These tiles are ideal for high-traffic spaces and come in different finishes, including glossy, matte, and textured.
3. Stone Tiles
Made from natural stones like marble or granite, these tiles feature beautiful, one-of-a-kind patterns, though they can be more porous and sensitive to certain cleaners. Regular sealing is often required to protect the surface.
4. Textured Tiles
Textured tiles have a rough, embossed surface designed for enhanced slip resistance. These tiles are commonly used in high-traffic areas, bathrooms, and outdoor spaces. While durable and functional, their rough texture traps dirt, making them harder to clean and maintain than smoother tiles.
General Tile Cleaning Tips
1. Regular Sweeping And Vacuuming
Dust and dirt particles may damage the surface of your tiles by causing scratches. Regular sweeping or vacuuming with a soft brush attachment helps prevent this.
2. Mopping With Warm Water
A simple mop with warm water can often be enough for routine cleaning. Properly squeeze out water from the mop to prevent excess moisture on the tiles.
3. Spot Cleaning
Quickly clean up spills to avoid stains and damage.
How To Clean Rough Floor Tiles?
Rough floor tiles, often used for their anti-slip properties, can be challenging to clean due to their textured surface. Here’s how to clean rough floor tiles effectively:
1. Sweeping On Rough Tile Surface
Clear the floor of dust and dirt with a stiff-bristled broom or vacuum before you start cleaning. This keeps dirt from being ground into the tiles.
2. Scrub A Floor With Effective Cleaning Agents
You can create an effective cleaning solution by mixing warm water and a mild detergent. Use a scrub brush to apply the solution, concentrating on the textured sections.
3. Rinsing To Wash Away Soapy Residues
After scrubbing, give the floor a good rinse with warm water to remove any remaining soap or detergent. This helps avoid slippery buildup and keeps the floor cleaner for longer.
4. Drying A Tiled Surface Area
Use a dry mop or towels to remove excess water, preventing water spots and streaks. Drying the surface also helps prevent moisture buildup in grout lines, reducing the risk of mould or mildew growth.
How To Clean Textured Tiles?
Textured tiles, such as those used in bathrooms or as decorative features, require a bit of more attention. Follow these steps to clean textured tiles:
1. Vacuuming Grooved Tile Surfaces
Vacuum the textured areas and grooves of the tiles with a brush attachment to remove loose dirt and debris. This ensures dirt doesn’t get pushed into the surface during scrubbing.
2. Use Of Tile Cleaning Solution
A simple cleaning mixture can be made by combining warm water with a small amount of dish soap or a commercial tile cleaner. This effectively breaks down dirt and soap scum without damaging the tile’s textured finish.
3. Scrubbing Softly On Textured Areas
For textured tiles, use a soft brush to carefully clean between grooves and ridges. Focus on areas where dirt is trapped, ensuring you don’t use abrasive brushes that could scratch or damage the surface.
4. Rinsing And Drying Patterned Tiles During A Cleaning Process
After rinsing the tiles with clean, warm water to remove soap, dry them using a mop or cloth. This ensures no water spots form and prevents moisture from settling in the grooves.
How To Clean Kitchen Tiles?
Kitchen tiles can accumulate grease and food stains. Here’s how to clean kitchen tiles effectively:
1. Degreasing Solution For Cleaning Grease-Laden Surfaces
To tackle grease and food stains, mix warm water with dish soap or a specialised degreaser. This solution helps break down grease and makes cleaning more effective.
2. Scrubbing To Remove Greasy Kitchen Surface
Use a sponge or a soft cloth to scrub the tiles. Focus on greasy areas, such as the backsplash or around the stove, where oil and food splatters tend to accumulate.
3. Rinsing To Wash Out Remaining Cleaning Agents
After scrubbing, rinse the tiles with clean water to remove any soap residue, ensuring there’s no leftover cleaner that could attract more dirt or leave streaks.
4. Drying And Polishing To Make A Clean And Glossy Look
After drying the tiles with a microfiber cloth, give them a quick polish for a sleek, shiny surface. This restores their natural shine and leaves your kitchen looking spotless.
Best Chemicals To Clean New Tiles
For new tiles, especially those with a glossy finish, it’s important to use the right chemicals to maintain their appearance:
1. Neutral Ph Cleaners
Neutral pH cleaners are gentle and safe for most tile types, including glossy or delicate surfaces. These cleaners effectively remove dirt and grime without damaging the tile’s finish or leaving streaks.
- Best For: Regular cleaning of ceramic, porcelain, and glass tiles.
2. Vinegar Solution
A simple mixture of white vinegar and water (1:3 ratio) is an eco-friendly, non-toxic cleaner that helps remove light stains, soap scum, and disinfect surfaces.
- Best For: Routine cleaning of ceramic and porcelain tiles (not recommended for stone tiles).
3. Bleach
Diluted bleach (1 part bleach to 10 parts water) is effective for disinfecting tiles and removing tough stains, mould, or mildew. Especially beneficial for white tiles, but be sure to use it in small amounts.
- Best For: White ceramic or porcelain tiles (avoid stone tiles).
4. Commercial Tile Cleaners
Specialised commercial tile cleaners are formulated to clean without damaging new tiles. They are ideal for deep cleaning while preserving the tile’s finish and grout integrity.
- Best For: New tiles, including both glossy and delicate surfaces, as well as grout lines.
Removing Stains From Tiles
Greasy tiles, especially in kitchens, require extra effort to clean. Here’s a step-by-step guide to effectively tackle grease and grime:
1. Oil and Grease Stains
- Method: Sprinkle baking soda on the stain, let it sit, then scrub with a soapy brush.
- Tip: Add dish soap or degreaser for tougher stains.
2. Hard Water Stains
- Method: Mix vinegar and water (1:1), spray on stain and scrub with a soft brush.
- Tip: Avoid vinegar on stone tiles.
3. Rust Stains
- Method: Use a rust remover as per the product instructions.
- Tip: Test the product on a small area first
Cleaning Greasy Floor Tiles
Rinse with clean water to remove residue, then dry thoroughly with a cloth or mop to avoid slips and water spots.
1. Sweeping Over Tiled Floor Surfaces
Remove loose dirt and debris using a stiff-bristled broom or vacuum, preparing the floor for cleaning.
2. Degreasing Solution To Remove Oily Grease Stain
Mix warm water with dish soap or a degreaser to break down oil and grease stains.
3. Scrubbing Accordingly To Nature Of Tiled Surface
Apply the solution with a scrub brush, focusing on greasy areas and grout lines to lift the grease.
4. Rinsing And Drying To Clean And Remove Slips From Tiles
Rinse with clean water to remove residue, then dry thoroughly with a cloth or mop to avoid slips and water spots.
Cleaning Oil Off Tiles
Oil spills can be particularly stubborn. Here’s how to clean oil off tiles:
1. Blotting Helps In Absorbing Oil Stain
- Method: Use paper towels or a clean cloth to blot up as much excess oil as possible. Don’t rub, as it can cause the oil to spread even more.
- Tip: Blot gently to soak up the oil without pushing it deeper into the tile surface.
2. Baking Soda Acts As Excellent Absorbent
- Method: Using a baking soda cover oil stain for about 15-20 minutes. Baking soda absorbs the oil and helps lift it from the tile surface.
- Tip: After waiting, gently brush away the baking soda, which should have absorbed most of the oil.
3. Scrubbing Using The Cleaning Solution
- Method: Make a cleaning solution by mixing dish soap with warm water Use a brush to scrub the stained area and remove any remaining oil.
- Tip: For tougher stains, use a scrub brush with stiff bristles to work the solution into the tile’s surface and grout lines.
4. Rinsing Removes The Soap And Any Remaining Oil Residue
- Method: Rinse the area with clean water to wash away the soap and any remaining oil.
- Tip: Dry the area thoroughly with a clean towel or mop to prevent slipping and water spots.
Using Bleach On Tiles: A Cautionary Guide
Be cautious when using bleach for cleaning as it is quite strong.
1. Dilution For Safe And Effective Cleaning Of Tile
- Method: Always dilute bleach with ten parts water for safe use. This reduces its potency while still allowing it to clean effectively.
- Tip: Avoid using full-strength bleach, as it can damage tiles or grout.
2. Application Of Diluted Bleach Solution On The Surface Of Tile
- Method: Apply the diluted bleach solution using a cloth or sponge, spreading it evenly across the tile surface.
- Tip: Focus on areas with heavy stains, mould, or mildew, but avoid prolonged contact with grout lines.
3. Rinsing To Remove Any Bleach Residue From Tile
- Method: After cleaning, rinse the tiles thoroughly with clean water to remove any bleach residue.
- Tip: This step ensures that no bleach remains on the surface, preventing damage or discolouration.
4. Ensure Proper Ventilation While Cleaning Tiles In Home And Kitchen
- Method: Make sure the area is properly ventilated when using bleach to avoid breathing in fumes.
- Tip: If possible, wear gloves and a mask to protect your skin and lungs from bleach exposure.
Using Vinegar on Tiles
Vinegar is a natural cleaner that’s safe for most tiles:
1. Mixing Water And Vinegar To Create A Cleaning Solution
- Method: Fill a spray bottle with equal parts white vinegar and water to create a simple, effective cleaning solution.
- Tip: Adjust the ratio for stronger cleaning if needed (e.g., 1:1 for tough grime).
2. Spraying Cleaning Mixture Over Tiles
- Method: Mist the tiles with the vinegar-water solution, focusing on areas with dirt or stains. Give it a few minutes to sit so it can break down the dirt and build up.
- Tip: Don’t oversaturate—just a light misting is enough.
3. Wiping The Tiles Properly To Remove Stains And Dirt
- Method: Use a fresh cloth or sponge to wipe down the tiles, removing dirt, stains, and grime.
- Tip: For textured or grouted areas, you may need to use a soft brush for more thorough cleaning.
4. Rinsing To Remove Vinegar Solution From Tiles
- Method: After cleaning, rinse the tiles with clean water to remove any vinegar residue.
- Tip: Dry the tiles with a microfiber cloth to avoid streaks.
Cleaning Wall Tiles
Wall tiles, especially in bathrooms and kitchens, can accumulate soap scum and grease:
1. Dusting To Remove Dirt From Tiles
- Method: Use a dry cloth or a duster to remove loose dust and dirt from the tile surface before applying any cleaning solution.
- Tip: Dusting helps prevent dirt from becoming smeared around when cleaning.
2. Cleaning Solution To Act Quickly Against Strains And Dirt Over Tiles
- Method: Mix water with dish soap or a mild cleaner to create a solution that will break down dirt and grease on the tiles.
- Tip: For tougher stains, use a gentle all-purpose cleaner or a bathroom cleaner designed for tiles.
3. Scrubbing To Remove Dirt And Tough Spots Over Tiles
- Method: Use a sponge or brush to scrub the tiles, starting from the top and working your way down to avoid dripping dirt. Focus on areas with soap scum or grease buildup.
- Tip: For textured tiles, use a stiff-bristled brush to clean grooves and grout lines.
4. Rinsing And Drying To Remove Any Soapy Or Cleaning Residues
- Method: Rinse the tiles with clean water to wash away any soap or cleaning solution residue.
- Tip: Dry the tiles with a clean cloth or microfiber towel to prevent water spots and streaks.
Polishing Tiles
To give your tiles a shiny, polished look, follow these steps:
1. Cleaning To Remove Any Dirt, Grime, Or Stains
- Method: Clean the tiles thoroughly to remove any dirt, grime, or stains, using the appropriate cleaning method for your tile type (e.g., mild cleaner for ceramic, vinegar solution for porcelain).
- Tip: Ensure the tiles are completely dry before proceeding to the next step.
2. Polishing Solution Restores Shine And Protects The Surface
- Method: Apply a commercial tile polish or make a simple water-based solution with a few drops of dish soap and water. This will restore shine and help protect the surface.
- Tip: Use a polish designed for your specific tile type (e.g., a stone-safe polish for marble or granite tiles).
3. Buffing For Smoothing Or Shining The Tile Surface
- Method: Tiles are buffed in circular motions using a soft cloth to get an even, glossy finish.
- Tip: Buff gently, avoiding excessive pressure, to prevent damage to the tile surface.
4. Drying To Ensure No Streaks Or Residue Are Left Behind
- Method: After buffing, use a clean, dry cloth to wipe the tiles, removing any excess polish or solution.
- Tip: This step ensures no streaks or residue are left behind, leaving a smooth, shiny surface.
Putting it All Together
Keeping your tiles clean and well-maintained is essential for preserving their beauty and functionality. Whether you’re dealing with rough floor tiles, textured tiles, kitchen tiles, or wall tiles, the right cleaning methods and products can make all the difference. Remember to always test a small, inconspicuous area first when using new cleaning solutions, and avoid harsh chemicals that can damage your tiles. With these tips, your tiles will look pristine and last for years to come.
For professional help, consider contacting Melbourne Cleaning Services. Our experts are equipped with the knowledge and tools to clean and maintain every type of tile, ensuring they look their best. Whether it’s routine maintenance or dealing with tough stains, we provide comprehensive cleaning solutions tailored to your needs.